This page allows you to search for multiple providers and resources, schedule a multi-resource appointment for a patient, or create a new appointment slot.
A multi-resource appointment consists of two or more separate appointment slots with different providers or resources that are scheduled for one patient on a single day or across multiple days.You can schedule up to five separate resources for one multi-resource appointment. You can search for days with open appointment slots by the time of day, specific provider or resource type, appointment type, department, and day of the week using drop-down menus.
When you search for multi-resource appointments with same-day availability, athenaNet calculates the requirements of the selected appointment set, such as the appointment wait times and the order of appointments, when determining available time slots.
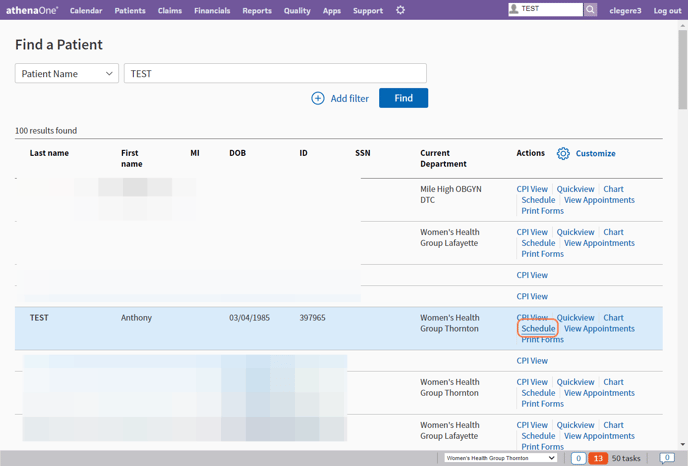
Find your patient by typing in: [LAST NAME], [FIRST NAME].

Once you locate your patient, click "Schedule."
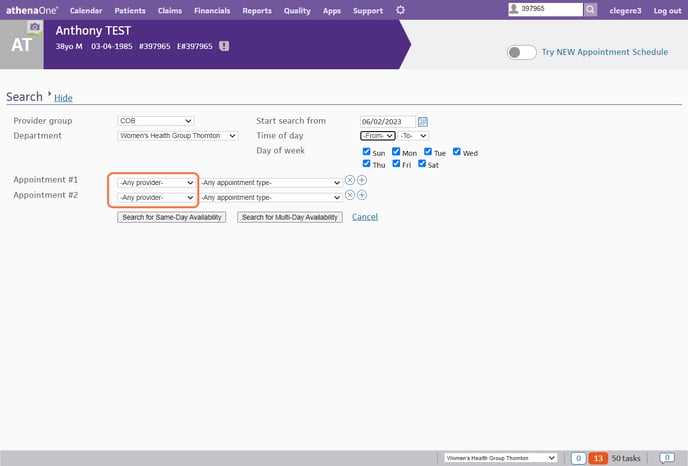
Click on "Multi-Resource."

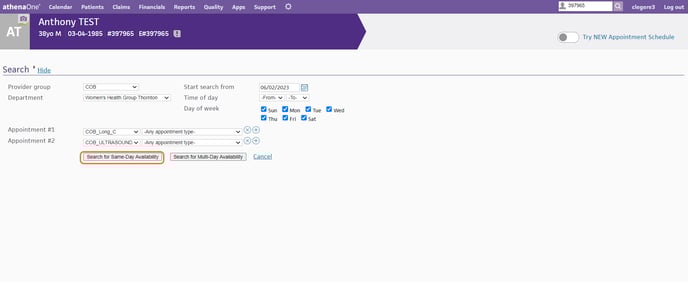
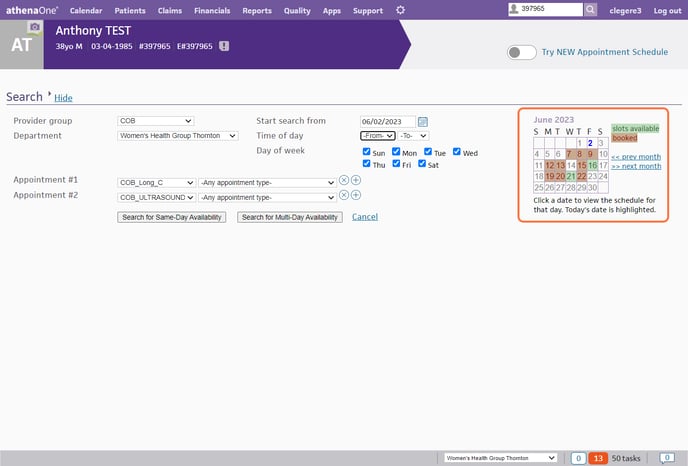
Fill in the provider for Appointment #1 and #2.
Once you have your providers selected, select "Search for Same-Day Availability."
Next, click the date that you are looking to book.
The one-month calendar view (in the upper right of your screen) automatically reflects your monthly search criteria.
The dates on the calendar are color-coded:
- GREEN highlight: day has slots available matching the search criteria
- RED highlight: slots matching the criteria are all filled
- GRAY highlight: unavailable, uncancelled, unfrozen slots matching your criteria
- BLUE bold type: today's date
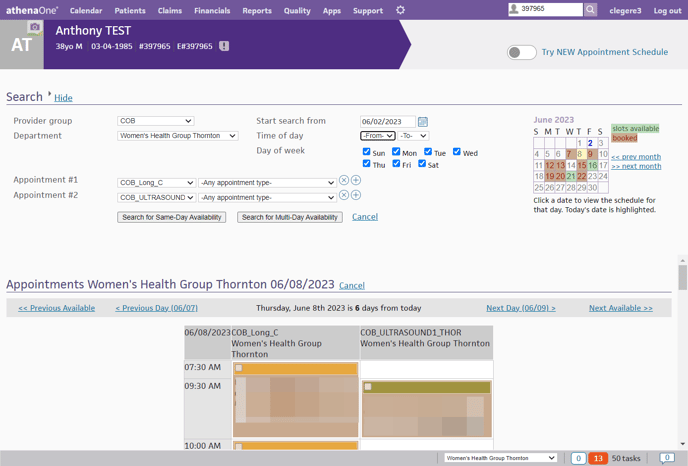
Click the day in the calendar view that you want to schedule. The selected day's appointment slots appear below, in a grid showing all slots that match the selected criteria.
(Note: You may need to adjust the scroll bar to see the top of the grid and the "Appointments" heading.)
Locate the slots that you'd like to schedule.
You can also continue to explore your options. Click on another calendar day to display the appointment grid for that day. (You can click the links for << Previous Month or >> Next Month to navigate quickly.)
Once you have selected your day, you now have the ability to see the two schedules, side by side, allowing for easy scheduling.
Within this example, I am showing a provider's schedule and an Ultrasound schedule.
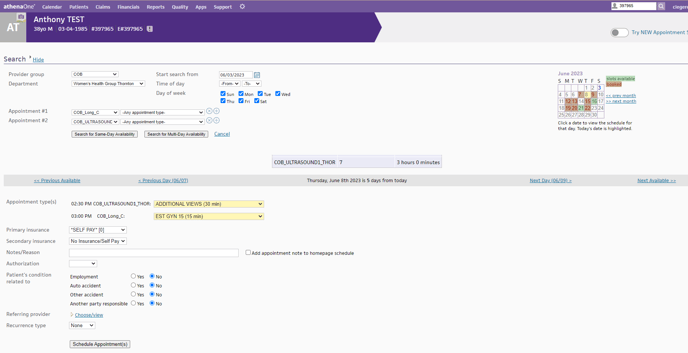
Now that you have selected the two appointment types, you can view them at the bottom of the schedule sheet.
- Appointment type(s): (at the bottom of the page) — will be auto-filled from the appointment type(s) you have chosen
- Primary insurance: Select (or verify) the patient's insurance for the appointments.
You may need to scroll down to the bottom of the Appointments grid. - Notes/Reason: Enter any notes (for example, the reason for the visit). Please remember that after you add a note, you cannot delete it.
- Authorization: This field appears only if the patient has at least one insurance policy. Select an existing authorization or referral number from the menu, if applicable. To create a new authorization or referral, select "Add New." Additional fields appear.
Note: If a patient cannot furnish authorization information at the time of scheduling, you can bypass this step until check-in time. The authorization is saved on the Authorization Worklist.
- Referring provider — Click "Choose/view" to display the Referring Provider Lookup tool. There, you can search for the referring provider by number, name, specialty, or NPI number. Enter your search information and click "Find."
- Type: Select "Pre-cert" or "Referral."
- Insurance authorization number: Enter the insurance authorization number.
- Effective date: Enter or select the effective dates for this authorization or referral.
- Authorized visits/units: Enter the number of visits or units covered by the authorization. Enter the same number for "Approved" and "Remaining," and select "Visits" or "Units" from the menu. athenaNet automatically decrements the number of authorized visits or units.
- Referred-to-provider: This field automatically displays the name of the provider with whom you are scheduling the appointment.
- Specialty: This field automatically displays the specialty of the provider with whom you are scheduling the appointment.
- Diagnosis code: Enter or select the diagnosis code associated with the authorization. You can type a period to access the Diagnosis Lookup tool in the "ICD-9" or "ICD-10" fields.
- Procedure code: Enter or select the procedure codes associated with the referral. You can type a period to access the Procedure Lookup tool.
- Additional information: Enter any other information that you want to record about this incoming authorization.
- If the patient's condition is related to employment, auto accident, or other accident, or if another party is responsible for the patient's condition, set the appropriate option to "Yes." (A practice configuration setting controls these fields: they may or may not appear or be required in your practice.)
If you set "Auto accident" to "Yes," an additional "Place" field appears. Enter the two-letter state abbreviation where the accident occurred.
Click "Schedule Appointment(s)."
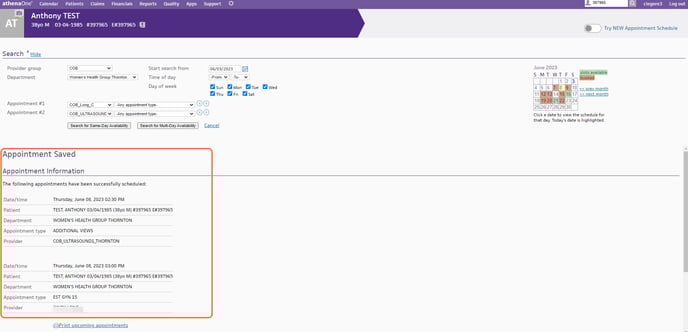
- A confirmation message appears, or:
- You may be prompted to enter a reference number or a prior authorization number if the appointment insurance package requires it. If the patient cannot furnish this information now, you can bypass this step and enter the number at check-in or at charge entry.
- athenaNet warns you if you click a slot that has already been booked.
- athenaNet warns you if the total duration of the selected slots is less than the duration of the selected appointment type.
After you have finished booking the appointment, the "Appointment Information" will be displayed. You can easily print the appointment here for the patient if needed.
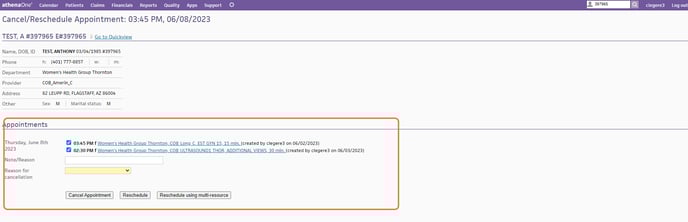
If you need to reschedule or cancel the appointment, navigate to the patient's "View Patient Appointment Page" and click on one of the two MRS appointments.
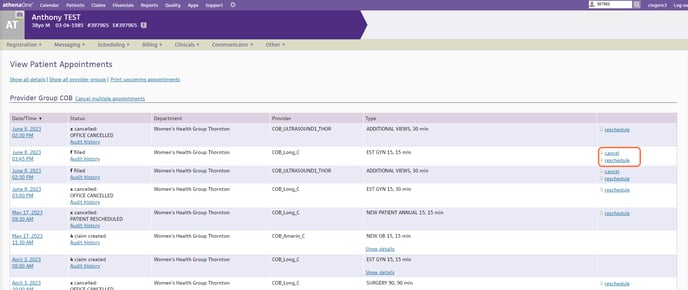
This will then bring you to the "Cancel/Reschedule Appointment" page.
Make sure to click on both appointments in order to cancel or reschedule both.
Choose the "Reason for cancellation."
Finally, select either "Cancel Appointment," "Reschedule," or "Reschedule using multi-resource."