
-
Go to athenanet.athenahealth.com
-
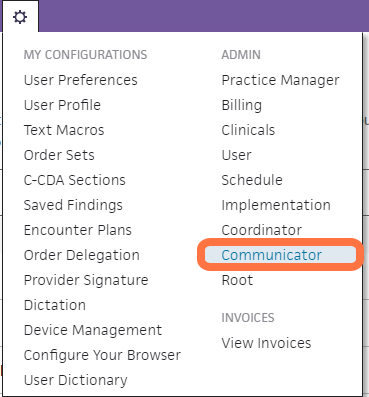
Click on the "Gear" icon in the main toolbar

-
Click on "Communicator"
-
Click on "Instructional Messages" in the Communicator Admin Bar
This section allows you to edit any of your custom messages or create a new message.
-
Click the "Create New" button on the right of the screen
For this example, I will have you create a new message. If you want to edit an existing message, you can follow the same steps.
-
Start creating your new text or edit old messages
First, name your new instructional message. We recommend defining a naming convention to use for all instructional messages. For example, appointment type followed by what’s stated in the message (i.e. 15 minutes: meds, insurance, parking).
Second, check off the reminder messages you want to use. You have the option of text, call, and/or email. All of the reminders can be sent in Spanish as well, but you must input the translated text yourself.
Lastly, click "Save."
-
Click "Instructional Message Mapping" in the Communicator Admin Bar
This step will allow you to set your default instructional messages, as well as map custom instructional messages to selected appointment types.
-
Click on the specific department you want to start with.
If you see a blue star near one of your departments, that means there is already a custom edit made for that department.
-
Once you click on the department you want to edit, click the "Edit" button under the "Filter" dropdown.

-
Click "Use custom settings"
Then, select "Map new instructional message" and choose the instructional message you want.
Now, check the appointment types you want to be mapped to that specific instructional message
You can add as many instructional messages as you want, but make sure to map each appointment type to only one message.
Do not forget to hit "Save" when you're done!
-
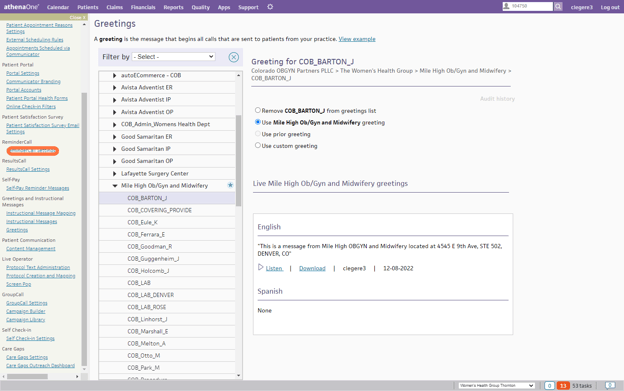
Next, visit "Greetings" in the Communicator Admin Bar
This is where you'll set up your greetings, the messages that begin all outgoing calls to patients.
-
Click on the department you want to edit
If you see a blue star near one of your departments that means there is already a custom edit made

-
Once you've selected the department, click one of the four available options
Your options here are:
- Remove (department name) from the greetings list: This will not state your department in the phone call
- Use (department name) greeting: This will state your department name
- Use custom greeting: Create your own greeting and include your address
- User Prior greeting: Choose a greeting you've already created
The effective date of the greeting will always be the following business day.
Do not forget to "Save" your work.
-
If you want to take "Greetings" a step further, include the provider's name as well
To do this:
- Click on the dropdown arrow
- Click on the provider
- Choose "Use Custom Greeting"
- Choose "Create"
- Decide if you want the name of the provider and the address sent out to the patients
Do not forget to "Save" your work.
-
Click on "ReminderCall Settings"
-
Click on the department you want to edit
If you see a blue star near one of your departments that means there is already a custom edit made.
- Click on "Edit"

- Edit Settings for Department - General
Click, "Use custom settings."
Message Content: If you want the appointment time included, click Include appointment time.
Default patient area code: If a patient's phone number was entered without an area code, the default patient area code will be determined based on the location of your practice. We recommend collecting full ten-digit phone numbers from all patients.
Multiple Appointments: If you are utilizing MRS (Multi Resource Scheduling) you want to use this check box and use the drop-down to the department.
Advanced Settings:
Here, you can activate providers by default, send messages for frozen appointments, and choose to offer calls in Spanish. (Note: Spanish greetings should be unchecked if you do not have Spanish checked in your Instructional Messages.)
- Edit Settings for Department - Appointment Types
Select "Use Custom settings."
Send Appointment Reminders: If you want to utilize all appointment types, choose "All appointment types." If you want to disable any appointment type, choose "Disable selected" and select the appointment types you do not want to utilize.
- Default Instructional Message - Calls
Choose, "Use Custom settings."
Phone calls: Decide whether to enable phone calls.
Keypad Input: You can have patients Press 1 to confirm and/or Press 2 to reschedule.
Days to call: Select the days you want phone calls to be sent.
Message Window: Choose the timeframes you want phone calls to happen within.
Main Call: It is Athena's best practice to have phone calls go out 2 days before the appointment, but you can change this. You can also select if you want to call the mobile number first and if you want Athena to call the patient prior to the first drop-down.
Transfers: If you are utilizing Athena's live operators, you can choose this option to
allow any rescheduled patients to be sent over to your practice. Be sure to enter the transfer phone number and hours of operation. If you don't want transfers, select "Do not allow transfers."
If "Allow transfers to live operators" is enabled, then patients are prompted to press 2 to reschedule. If disabled, then patients are prompted to press 2 to request a reschedule. Upon pressing 2, patients are told to contact the office during normal business hours to reschedule their appointment.
At least 4 days must be available for making calls. Live operators are not available on Saturday or Sunday.
If transfers to live operators is selected, the transfer window will match the message window.
If transfers to practice is selected, the transfer window may be shorter than the message window.
Note: The message window and transfer window start times should always be the same.
- Default Instructional Message - Emails
Select "Use Custom settings."
Emails: You can enable emails here.
First Attempt: Choose between every day or weekdays only.
Main Email: Choose between 1-7 days before the appointment. If you want to add sending out an earlier email, select "Add early email" and choose the number of days before the appointment you want the email sent.
Message Window: Choose the time slots you want emails sent within.
- Default Instructional Message - Text Messages
Select "Use Custom settings."
Text Messages: You can enable text messages.
First Attempt: You can choose between every day or weekdays only.
Text Lead Time: Choose between 24-120 hours prior to the appointment.
Message Window: Choose the time slots you want text messages sent.
Cancellation: You can choose to allow cancellations via text messages. (Note: Allowing to cancel via text messages will not send a message to your admin team.)